30 January 2012

A Year in Spinning

As a side note, I chose to make the photos for this image-heavy post smaller so that they would load faster.  I have most of these photos in higher quality up either on the blog already or on Ravelry.

Today marks a year since I first learned to spin!  I still remember that day very well.  I was freezing on my ten minute walk to Webs that morning with very little idea of what spinning was or how to use that funny little rod with a disc on one end.  It was a long and oftentimes frustrating day spent learning how to use my drop spindle, but luckily I had a very patient and wonderful instructor.  By the end of that day I walked back home with my very first skein of handspun:

I was not even moderately happy with what I had made, but I was still hooked.  I started buying as much fiber as I could find and began to spin more than I knitted.  Even today, I'm still just as excited by spinning as ever.

Looking back at my finished projects over the course of the year, I am so glad that I took the time to push myself to learn and improve this skill, because it has become so fun and rewarding in the long run.  Now I cannot imagine my life without spinning!

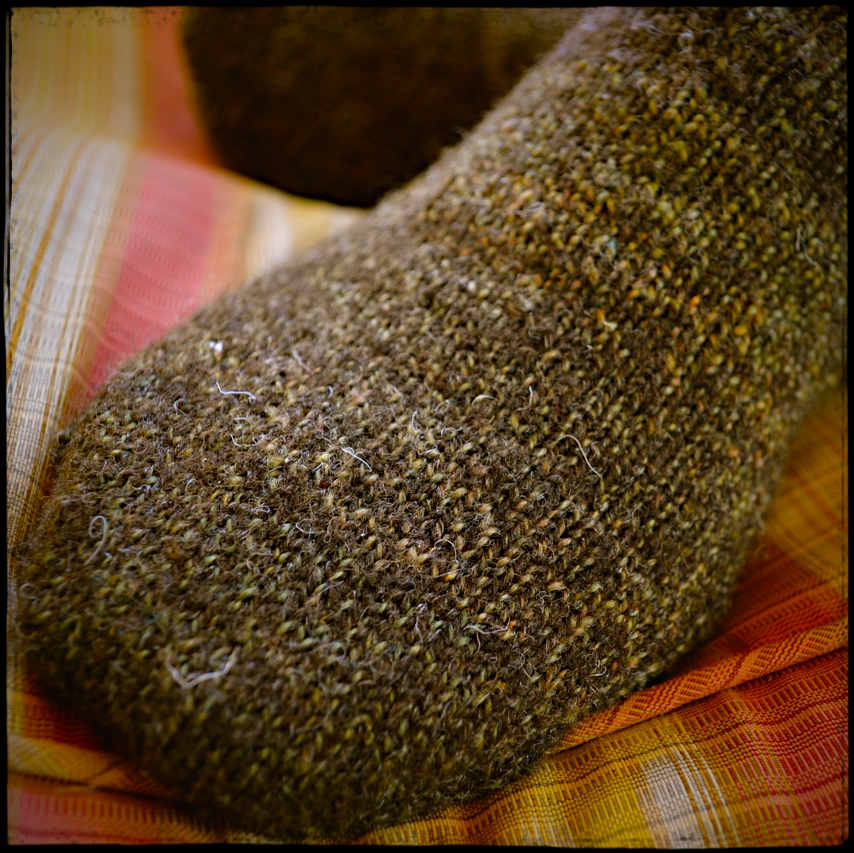
Here are some of my successes this year in roughly chronological order:


I cannot wait to see what lovely handspun this upcoming year will bring!

24 January 2012

7 Reasons to Spin


When I learned to spin, I can honestly say that it profoundly changed the course of my knitting and crafting forever. I truly enjoy picking up my spindle and spinning away, watching the fibers bind together. Now I cannot imagine my life without it.

I decided to come up with some reasons why I enjoy spinning:

1. Can be incredibly relaxing once you get the hang of it. Learning can be annoying and stressful, but once that fiber is gliding through your fingers it can be a form of meditation.

2. Enables you to create one-of-a-kind yarns using special blends with exotic fibers and different spinning techniques can give your creation a whole new feel and personality.

3. Allows knitters to specially hand craft yarn for a specific project from start to finish. My spinning teacher told us that this would be perk of learning to spin, but at the time I wasn't sure what that meant.

4. Like knitting, usually fairly portable. Now I'm talking drop spindles and select wheels. I'm a spindler and easily spin while at the airport or in the car. It is also fun to walk around the house while spinning.

5. Spinning is very satisfying to finish and get to say "I made this yarn"! It is also extremely exciting to get to knit with your spun yarn and gives your finished object a whole other meaning.

6. Makes a connection to the past. Spinning is an ancient craft and so your ancestors spun too. For me it is a lot of fun knowing that I am aiding in the preservation of this craft tradition.

7. Presents the challenge of learning something new. For me, one of the best parts of learning how to knit was the satisfaction of masting new techniques and producing a tangible final product that could then be made useful. Spinning was the same way, a whole new world of challenges and knowledge opened up when I learned how to spin.

Also, cats love spinning.

So, if you don't know how to spin and have any interest at all, I would highly recommend that you give it a go. The worst thing that can happen is that you will get hooked on a new craft.

What are your reasons for spinning?

22 January 2012

Dyeing Yarn for Colorwork

One of my more lofty Fiber Goals for 2012 is to Complete a colorwork sweater. After a bit of thought I have found the perfect pattern: Velvet Morning from Knitty, Winter 2011.  From the very beginning I decided that I wanted to dye the secondary color yarns myself for a special touch (I'm going to buy the yarn for the primary color).

So, I broke out my acid dyes and got to work dying some Cascade 220 Superwash:

I'm not sure why, but Cascade superwash is a lot of fun to dye.  I'm not sure how to describe it, it's just a friendly yarn to dye with.  It always looks great and doesn't felt, but it is fairly pricey.

My favorite one is the gray for sure.  It has this wonderful frosted look to it.

I have to run by Webs to buy the yarn I need for the primary color before I can cast on.  I almost cannot wait, I'm so excited to cast on!

19 January 2012

Speaking of Yarn - Comparing Brands

Lately all of my knitting time has been spent working on a sweater for my mommy (I know, I spoil her, but she is pretty awesome).  Last year I made a pair of alpaca/wool gloves that she loves, and so I offered to knit her a similar sweater.  Because, honestly how often do you find people to knit for who honestly love what you make them?  I found a simple pattern that she really likes and started knitting!

Here is the progress I've made so far.  Yes, that is ribbing, and yes, the progress is slow.

Right from the start I really wanted to use my favorite Berroco Ultra Alpaca for the project.  Unfortunately, none of the local yarn stores carry it (the horror!), so I had to make do with a similar yarn.  I thought that buying Cascade Alpaca Lana D'Oro would be equally good (50% wool, 50% alpaca), was I ever wrong!  Immediately after I wound it up I realized, it is not even remotely the same.

So, I'm seriously disappointed in what I consider Cascade's knock-off of Berroco's Ultra Alpaca.  The biggest problem I have with it is that it does not have that alpaca softness, it feels more like regular wool .  I'll have to wait to get back to college to double check, but I would also say that the strands feel less puffy and substantial as well, giving the yarn a cheap feel.  

So, if you are ever in my position in the future, I would recommend that you not settle for the Cascade version, wait until you can buy the real deal (especially since there is generally only a dollars difference in price).  However, I still think that this sweater is going to look beautiful and be pretty warm too!

16 January 2012

Eek, Steeking!

I recently went to the local library and inevitably found myself looking at knitting books, something I don't really do often.  I don't own a whole lot of knitting books because they are either full of horribly tacky patterns or are "Knitting for Beginners" kinds of resources.  However, our little rural Kansas library did have Color by Kristen by Kristen Nicholas, which I immediately checked out.

After flipping through this book, I was so inspired by her fair isle designs that I almost overcame my ongoing fear of all things colorwork.  The author isn't the best at tutorials, but she has such a fantastic color aesthetic that I really identify with.  She also has some really attractive patterns and gives loads of suggestions for making your own designs, which to me makes this book well worth buying.

She is also a huge advocate for knitting all colorwork in the round and frequently uses steeks, a technique I was not very familiar with.  I quickly decided to knit up a swatch (which she is also fond of) using one of her designs with the intention of steeking.

Because I didn't have a sewing machine handy, I actually somehow remembered how to crochet long enough to secure the steek by single crocheting the edges.  This is actually the first time I have ever used crochet for something useful (hooray!):

Here I am cutting my fancy steek. I was terrified at this point, I swear:

Here is the finished swatch where you can see the pretty pattern (please excuse the colors, they were the only acrylic options I had):

The steek looks great and seems to be holding very well.  This certainly has made me more confident in my colorwork ability and should make it easier for me to meet my Fiber Goal for 2012 of Complete a Colorwork Sweater.  Also, for one of my most recent projects I have been thinking about putting in a zipper, which basically requires a steek.

Learning new techniques can be challenging, but it can really pay off!  Have you learned any new techniques recently?

14 January 2012

Knitting Disappointments

I had planned to present a new project to you all tonight; however, creativity was not kind to me today.  I know that a lot of my readers have blogs of their own, which I follow fairly regularly, and I have been  blown away by some of the projects that have been finished over the course of this week.  Seriously, you all are incredibly talented!  If I have not had a chance to see your work yet, well, I'll go out on a limb and say that it's pretty great.

I've been itching to share my latest project with you, a pair of gloves from an old American Red Cross pattern from an amazing collection of vintage patterns designed for soldiers fighting in World War I and World War II.  My partner of seven years (I frequently call him Mr. Engineer) has been begging me for a new pair of knitted gloves, and because he is a history buff (and plays his fair share of Call of Duty type games) I thought this pattern would be ideal.

I found the perfect yarn for the project, and then cast on and powered through.  It was working out great for a while, the first glove fit perfectly and he loved how it came out.  I was so excited to finish them at that point that the project went really quickly...until I ran out of yarn.  This is a problem I've never experienced before, and frankly I didn't see it coming.  I think the gauge was a little tight and that ate up more yarn than I expected.  The most painful part is that it ran out halfway through the pinky and right before finishing the thumb.

I was on the home stretch (picture taken prior to tragic event)!

The worst part is that I'm getting ready to leave town for a week and the local yarn store I bought the yarn from is an hour in the other direction.  So, I'm not entirely sure when Mr. Engineer will receive his finished gloves.

I'm annoyed by this knitting experience, but sometimes crap happens!  I apologize for the lack of project news too.  Next week will likely bring more successes and more positive posts (in particular, I'm very excited to share an amazing knitting book I'm obsessed with right now).  Until then!

11 January 2012

Fiber Review -- January 11th

I've gotten a lot done so far this winter break!  Most of all I have experimenting a lot and going outside of my comfort zone to try new things.

I'm still trying to decide exactly what I want this blog to look like and what sorts of content I want to include.  So, for a while I want to try a bi-weekly fiber update, starting with today.

I've finished several goals for my Fiber Goals for 2012 these last two weeks:

I completed my first spin-to-knit project, some toasty socks for my wonderful mother:

I dyed yarn with black tea to produce a surprisingly gorgeous color:

Secret Spiral Cowl - My first attempt at designing a pattern


These last few days I have also finished some projects and started some new ones:

I unraveled a thrift store sweater, which turned out to be a huge disaster:

Spun some single ply merino wool:

I feel pretty productive, but then again I'm off classes until the end of the month and I'm hundreds of miles away from my lab.  Once I get back to college, most of my free time will disappear mysteriously.

10 January 2012

An Experimental Cowl

I've always been one of those knitters that is completely dependent on patterns for pretty much everything.  Yeah, I can knit a vanilla sock without direction, but anything more than that and I'm completely, utterly lost.

So, one of my Fiber Goals for 2012 this year was to
     Design a pattern and publish


The main reason for this goal was to help me escape from my comfort zone a little bit more and just try knitting something without a pattern for guidance.  So, I decided to start simple, cast on a cowl, and see what happens.

And I ended up with my Spiral Secret Cowl:


Yarn: ~160 yarns of worsted or aran weight yarn.
Needle: One 16" circular needle, US 8.
Gauge: Not very important, to your liking.

Cast on 80 stitches loosely.

Place marker and join for round

Row 1: *K2, P2, repeat from * to end.
Row 2: P1, *K2, P2, repeat from*, ending in K2, P1.
Row 3: *P2, K2, repeat from* to end.
Row 4: K1, *P2, K2, repeat from*, ending in P2, K1.

Repeat rows 1-4 until cowl reaches 7" or until desired length and bind off loosely.

The final product is very warm with an attractive pattern.  I think that you could use single ply handspun for this cowl very easily too.

I would not really count this as a pattern though, because it is so simple and easy.  So, I'm not going to count this towards my fiber goal of designing a pattern.  But I think that this is a huge step forward and next time I will be up for designing something more ambitious such as a sock pattern.

I really loved the yarn I used for this project.  In fact, I enjoyed every part of working with it, which was a relief because I had never even heard of the brand before.

This yarn is Brown Sheep Lanaloft, which is a worsted weight, single ply yarn in 100% wool.  I have no complants whatsoever with this yarn, and a majority of Ravelers seem to agree with me according to the star rating.  Unlike most single ply yarns I've worked with (...Noro), the fiber isn't horribly overspun, but is not splitty.  Also, at ~$7.50 for 100 grams and 160 yards, this yarn will now be my go to cheap wool instead of Cascade 220.

Also, look at that bright, happy yellow!

08 January 2012

Winter Woolfest 2012

On Saturday I was able to stop by the Winter Woolfest 2012 in Wamego, Kansas.  It was definitely worth the two and a half hour drive up there because there was a great turnout!  I was especially surprised by how many vendors there were, considering Kansas does not produce a whole lot of fiber.

The event was hosted at the Columbian Theatre on main street Wamego

right next to The Wicked Stitch, a wonderful LYS that actually stocks spinning wheels!

Not only was the festival filled with local fiber vendors and fiber enthusiasts, but they even had a variety of fantastic classes that were offered for free!  I had planned on attending the one on speed knitting, but my family wanted to explore Wamego and I'm planning on going to squam this summer where Stephanie Pearl-McPhee will actually be teaching the method.

I did however buy a boatload of fiber before I left:

This is 100% undyed alpaca from the super nice people of Alpacas at Wildcat Hollow.  Lisa gave me some of this fiber for my birthday and I loved spinning it so much that I had to buy more.

Some pretty 100% merino wool (yes I bought it just for the colors, just merino is not my favorite to spin with) that was actually not local. --> Thank you to Sara for identifying this as fiber from Frabjous Fibers!

Lastly, 100% mohair from Little Angora House on the Prairie.  This was by far my best buy, not only was it at an amazing price, but the color and the quality is wonderful.  I can hardly wait until I can start spinning it up.

Also, as tempting as it was, we refrained from following the yellow brick road.

06 January 2012

Spin-to-Knit - A Success!

A few months ago, I decided that I was at the point in my spinning career where I should attempt a spin-to-knit project.  I also really I wanted to make my mother a warm pair of socks for christmas.

This is where I started, with some balls of fiber larger than my head!

Then I spun, spun, had some weight consistency problems, and then spun some more. 

I ended up with some stunning 3-ply fingering weight yarn (which I now realize that I did not measure the length of...). I decided on 2 strands of 100% black jacob wool for warmth.  It was a absolute dream to work with and smelled wonderful.  Then I plyed those with a merino/silk blend for some flexibility. 

Then I began to knit this lovely fiber up into a pair of vanilla socks for my mummy.  I won't say it was easy and there certainly were moments when I wanted to give up so badly because things were not going my way, but I stuck with it. 

I must say that this was the most satisfying finish to a project that I have ever experienced.  I felt so relieved and accomplished when she finally got to try them on and they fit perfectly! 

I also really love how the green blends in with the natural Jacob wool color.  I'm reminded yet again of how spinning yields new yarns that I will never find in stores, yarns that fit a project perfectly because they were made for that purpose. 

So, in the end, this project was a lot of hard work and stress over whether it would all work out, but it was completely worth it.  My mother has been wearing them pretty much non-stop too!

I also get to cross off another of my fiber goals of 2012:
           - Finish a spin-to-knit project

Have you ever conquered a seemingly impossible craft project?  Please drop me a line or link in the comments, I'd love to hear about your personal triumphs!

04 January 2012

Dyeing Fiber With Tea

I love tea.

I love tea so much that I often end up drinking 6-7 large cups a day.  Inevitably, I have had some situations where I have accidentally spilled tea and found that it dyes a variety of surfaces fairly easily. Naturally, I had to experiment with it.

Being one of those people who never wants to jump into a situation without background knowledge and a firm plan, I looked at what others have done.  After clicking around for a while I found a pretty good tutorial on how to dye yarn with black tea at a blog called tinateaspoon.

I didn't deviate too far from what she did; however, because I am a scientist, I feel obligated to record exactly what I did to allow for repeatability and to share the results of my experiment.

List of Materials Needed for Experiment: 
-- 1 skein of non-acrylic yarn
For this experiment I decided to use some unloved Knit Picks Bare Swish DK (100% superwash merino wool) that I had crammed into my closet.  Also, for the love of yarn, please skein and secure your yarn properly before dyeing or it will become a huge mess.
-- 3 bags of Lipton black tea 
I'm fairly sure that fewer tea bags can be used, as my dye bath was pretty strong.  I also do not think that they have to be unused tea bags either.  I think that any black tea can be used, but that the Lipton is going to be a cheaper option.
-- Large stainless steel pot and spoon for stirring
As far as I'm concerned, any kitchenware used with food-based dyes can be used for cooking again, but this is really up to you.

Protocol:
1.  Soak yarn in warm water for 1 hour.

2.  Fill a stainless steel pot with water and bring to a boil.

3.  Add tea bags to the pot and steep at a gentle boil for 1 hour.

4.  Remove tea bags and gently add pre-soaked yarn to dye bath, ensuring that the yarn is completely submerged in the solution.

5.  Keep solution at a gentle boil for 1 hour, stirring very gently (to avoid felting) every 20 minutes.

6.  Remove from heat and allow to cool to room temperature.

7.  Remove yarn from pot, rinse gently to remove excess dye, carefully squeeze to remove excess water, and then hang to dry.


Results:

Beautiful, naturally dyed yarn that you dyed yourself

with a gorgeous color you cannot easily find anywhere else.

Now I get to cross off my first fiber goal for 2012!
- Dye fiber/yarn with tea


Have you ever dyed with tea (or some other plant)?  Please share your own experiences!

02 January 2012

Adventures With Upcycled Yarn

One day I woke up and decided that I really wanted to unravel a thrift store sweater, just for the fun of it.  So, I went down to Goodwill, found a sweater, and got to work.

I ended up following directions from Neauveau fiber arts blog, which helped me avert complete disaster.

--> Note #1:  I would really like to add is that the author of the tutorial mentions that it doesn't really matter if you cut the seams like a crazy person.  Well, as I found out later, it does matter, a lot.  If you cut one little strand then you have breaks in the yarn in two places and it causes extra work later and crappier results.  So, please for the love of yarn, cut carefully!

--> Note #2: If you plan on dyeing the upcycled yarn later.  Do not settle for anything with acrylic content unless you love a huge dye mess and strange pastel colors.  Also to defend this decision, I just wanted to see what would happen, it just didn't turn out well...

--> Note #3: Please do not use a sweater made of a yarn that is just made up of thread sized strands, because it will likely look horrible no matter what you do (see later pictures of yarn carnage).

A wool/acrylic blend sweater from Gap for purchased from Goodwill for $3.99.

Here's my sweater unraveled and wound into haphazard balls. That is a lot of yarn for $4!

I then skeined this rather splitty yarn up and attempted to dye it with my Jacquard acid dyes, which turned out to be a terrible plan (see Note #2).  The yarn did not want to take up even half of the dye (and strangely only certain pigments) and most of the color washed out when rinsed later with differing results.  I am suspecting that the garment tag was lying about the 50% wool content.

After two disastrous dyeing sessions I gave up with coloring the yarn, even though I dislike white for clothing.  All and all, I finished with a fairly large amount of yarn in two different weights (worsted and bulky).

In conclusion, I would not count this project among one of my fiber successes, but it was a learning experience and a very inexpensive mistake.  My purpose in attempting this was to see if I could take an unloved sweater in the thrift store and attempt to give it a new life by unraveling it, dyeing it, and knitting it up into something new while saving money and being sustainable.

Despite my challenges with this particular project, I think that the next time I try I'll end up with much better results. Also, I would certainly not disuade anyone from trying this kind of project, it was a lot of fun.